SBI Net Banking Registration Through Online | step by step guides:
Hello friends, still you do not have SBI Net banking even after having the SBI Accounts. And also making bill payments, and fund transfers in offline. Guys, what are you thinking now? Are you wishing to register for SBI net banking? Just wait!! Now no need to visit the nearby SBI bank to register the net banking. In this tutorial, I will guide you step by step to register and activate the SBI net banking through online. the details process of SBI Net Banking Registration Through Online is given below, just go through it.
Step by Step Guides:
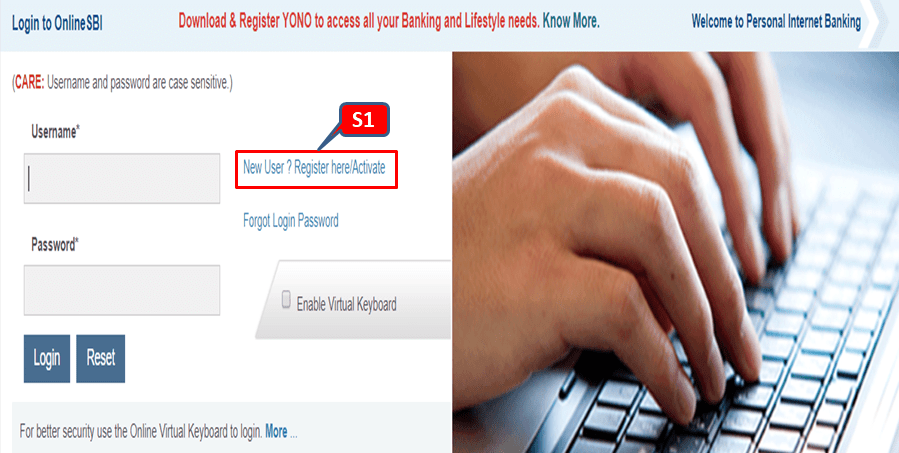
Step-1: Visit the SBI official website i.e https://retail.onlinesbi.com/retail/login.htm or
CLICK HERE to directly open the SBI web page. Next, you have to click on “New User/Register here/Active” (here it is marked as S1 in the below red highlighted box). Move on to the step-2 for subsequent processing.
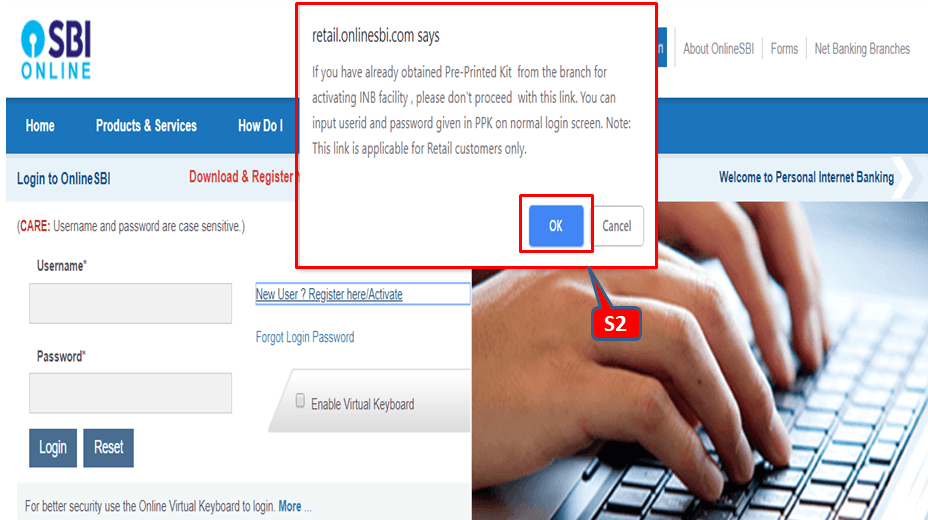
Step-2: In this step, after completion of step-1 you have to click on “ok” (which is marked in the below figure as S2).
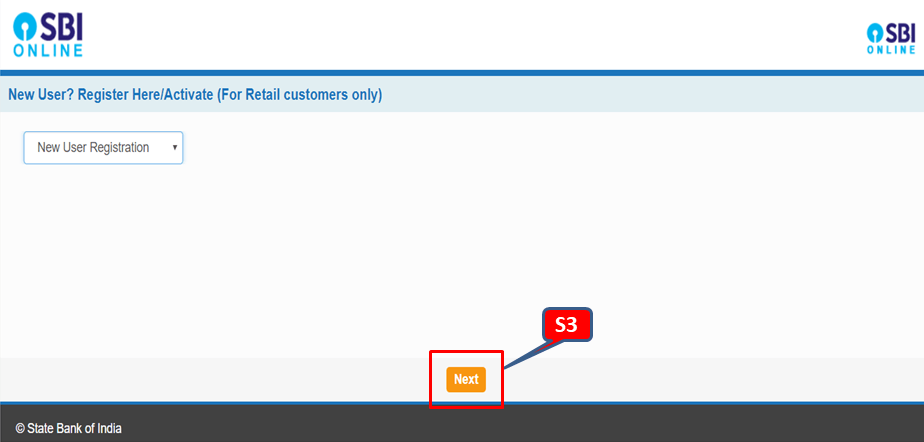
Step-3:
Have you completed the step-2? If yes, then just click on “next”. Which is highlighted in the red box in below figure?
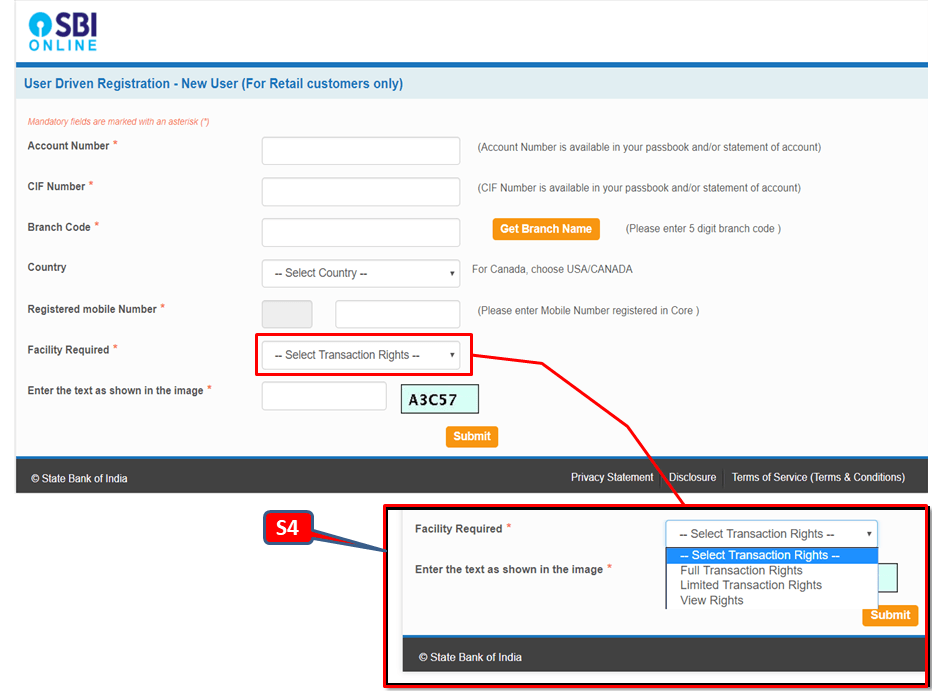
Step-4: Before proceeding with this step; you have to keep ready of account number. CIF number and Branch code. The CIF number is generally available in your passbook. And for the Branch code, there is a search option; by which you can easily find the branch code. In the section of facility requirements; SBI provides three options for their customer as [1] Full transaction rights [2] Limited transaction rights [3] view rights. Here you just select the full transaction rights. After filling up the all options on this page just do submit and continue to the next.
Step-5: They will send you the OTP to your register number. Next, you have to put the same OTP in the web page for confirmation.
Step-6: After confirming the OTP system will appear on a web page. There you have to choose the first option as “I have my ATM Card” then submit and follow the next step.
Step-7: After completion of step-6. A new page will appear; there you have to fill up and submit the details of the ATM card as [1] card number [2] valid up to [3] cardholder name and ATM pin.
Step-8: After submission of ATM details, the system will show you a temporary username and will ask you to create a password. After creating the password you will receive the temporary username and password to your registered mobile number.
Step-9: With the help of a temporary username and password you have to login the first time to create the permanent login and profile password.
FAQ:
Q1- What are the transaction rights available?
A- Three transaction rights [1] full transaction rights [2] limited transaction rights [3] view rights.
Q2- What do you mean by view rights?
A- You can’t do any transaction but you can view only data.
Q3- What is full transaction rights and limited transaction rights
A-full transaction rights: you can do transactions to any bank and you enjoy full facilities provided by the bank.
Limited transaction rights: you can just do the transaction to the bank those are within the same CIF circle.
Q4- Can I upgrade the transaction right in the future?
A-yes,
Source: SBI.
Thank you for reading……keep visiting Techiequality
Popular Post:

Shanti Gopal Pradhan is an experienced professional in Quality Management Systems, QA, Operations, Business Excellence, and Process Improvement. He has strong expertise in international standards including IATF 16949, ISO 9001, ISO 14001, ISO 45001, and ISO 17025, along with methodologies such as TQM, TPM, and Six Sigma.
He holds a degree in Mechanical Engineering along with an MBA, combining strong technical acumen with strategic business insight, he is a Certified Internal Auditor, Lead Auditor, and Six Sigma Black Belt, with a proven track record in driving quality transformation and operational excellence.